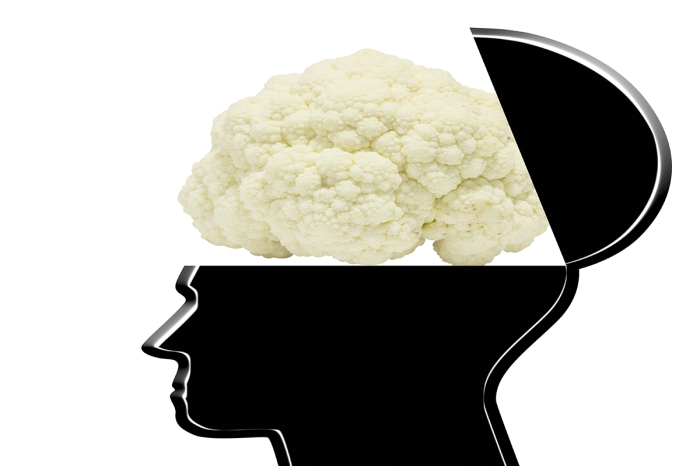
 Why ‘Brain food’, you may ask. Well, this post is about cauliflower, so the name works on several levels. First, cauliflower is brain food because it’s a good source of choline, a B vitamin known for its role in brain development. But in addition to that squidgy mass in your melon, cauliflower also benefits your heart and digestion, can help fight cancer, reduce inflammation, and all sorts of other good stuff. You can find more details here. Clearly, adding more cauliflower to your diet is a no-brainer. (See what I did there?) Finally, I call it brain food because, quite simply, it looks like brains, and that’s a good enough reason for me!
What’s really interesting to me about this cruciferous powerhouse, though, is how creatively it can be used. Sure, you can simply steam it, sauté it, eat it raw as crudite, or even boil it (though I believe there’s a special place in hell for those who boil vegetables to death), but it starts to get fun when you use it as a substitute for other carbs. I went low-carb about a year ago, dramatically reducing the sugar, grains and starchy vegetables in my diet. I did it for health, rather than weight-loss reasons, though a pleasant side effect is that I can now fit into 15-year-old trousers that I was unable to wear for years.
Because of this change in diet, I had to fill the gap previously occupied by bread, rice, potatoes and the like. I was a real carboholic, so this was not easy at first. But then I heard about something called cauliflower rice, or cauliflower couscous, as some people refer to it. I confess I was extremely dubious about this initially. But then I figured, what the hell? I do like cauliflower anyway, so why not give it a try? Well, I made it once, and I was hooked. It’s easy, it’s healthy (technically healthful, but that just sounds silly), and most importantly, it tastes good! You can use it anywhere you would use most grains, such as with a curry or Thai stir-fry, in a grain salad such as tabbouleh, etc. I confess I’ve never tried making risotto with it, and suspect that might turn into a gloppy mess, but even if that is the case, there are so many other great uses, it doesn’t have to be perfect for everything.
So here’s how you make cauliflower rice:
Take a head – or half a head if you don’t want to make too much – of washed cauliflower. Remove the leaves and the tough core. Chop it up into reasonably small pieces, and chuck them in a food processor.
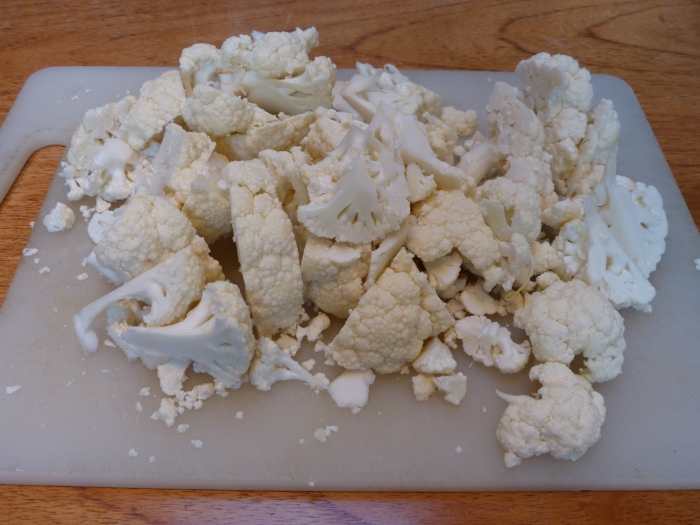
Pulse it on and off for a bit until you’ve got grain-sized pieces. Don’t do it for too long or it will start to turn into puree. This could be fine for some recipes, but not what we’re looking for here. You may be left with the odd larger chunk or two, but you can either just eat these while you’re cooking (my technique of choice) , or re-process them afterwards.

Tip the rice out of the food processor. You can now use it raw, sauté it in a little oil or butter, or nuke it for a minute or two. Really, whatever is your preference. Try it different ways, and see what floats your boat. Personally, I prefer sautéing it, but I can get a little lazy so often just chuck it in the microwave. If it’s going to be soaking up a lot of sauce anyway, it doesn’t need much of its own flavour.
Another creative way to use cauliflower is to make mashed potatoes. But of course without the potatoes.
First, cook the cauliflower. You can steam, nuke, boil or bake (at about 180C) the chopped-up florets. If baking, you may want to cover the cauliflower with foil to avoid the edges burning.
When the cauliflower is cooked soft, mash it by hand, or better yet, puree it in a food processor or with a hand blender, along with any other texture or flavour enhancers you like, such as butter, milk, cheese or garlic. Add salt and pepper to taste, and voilà, cauliflower mash! At this point you can still add other bits and bobs, if you like, such as spring onions, chopped olives, etc. Have it as a side, or use it to top fish, shepherd’s or cottage pie instead of potatoes.
Now here’s where it gets really interesting: cauliflower crust pizza
Once again, when I first heard of these, I was extremely doubtful. I mean, mimicking rice or potato is one thing, but pizza crust?!? That just sounds mental. However, since I do consider pizza to be nature’s perfect food, and missed it terribly on the low carb diet, I decided to give it a try. My first attempt followed a totally vegan recipe, meaning no eggs to bind the dough together. Ultimately, it was okay, but using chia seeds to bind the cauliflower crust together created a crust that was very much unlike a real pizza base. So I hunted around for an alternative recipe. I found one on the BBC Good Food site which seemed worthy of a try. I only followed it for the crust recipe, mind you. I’m enough of a seasoned cook (ha ha) to make a yummy sauce on my own, but I’m always grateful to have something to work from, which I can then modify as I see fit, or depending on what ingredients I actually have to hand at that moment.
For the base, you’ll need:
1 cauliflower (about 750g/1lb 10oz)
100g ground almonds
2 eggs, beaten
dried oregano
a little salt and pepper
Heat oven to 200C/180C fan/gas 6. Remove the leaves from the cauliflower and trim the stalk end, then cut into chunks. Pulse half the cauliflower in a food processor until finely chopped, as described previously. Transfer to a bowl and repeat with the remaining half. Spoon the cauliflower in a bowl, and microwave for a few minutes until softened. I don’t like to specify cooking times for nukers, as they really vary a lot, so I suggest starting with three minutes, have a look, and add more time if the cauliflower isn’t soft enough. In my microwave, a reasonably large cauliflower is soft enough after about 5 minutes. Tip onto a clean tea towel and leave to cool a little. Once cool enough to handle, scrunch up the tea towel and squeeze as much liquid as you can out of the cauliflower (this is important!), then transfer to a dry bowl.

 Stir in the ground almonds, egg, oregano, and salt and pepper to taste. Line a baking tray with baking parchment and grease with oil or butter. Mound the cauliflower mix into the centre of the tray, then use a spoon and your hands to spread out into a round. (Or be a rebel and make it a rectangle.) I’d aim to make it approximately 2-3 cms/ 1/8″ thick.
 Bake for 15-20 mins until golden brown and starting to crisp a little at the edges. Again, the timing will depend a lot on your oven, as well as how thick you’ve made your crust. The BBC recipe doesn’t say this, but I’ve had good results flipping the crust over when it’s nicely browned on one side, to ensure it’s set all the way through. You’ll have to be quite gentle if you do this, though, to keep it from falling apart.
While the base is cooking, or even better, before you start it, you can make the sauce. For this you’ll need:
1 can/pack chopped tomatoes
1 tbsp tomato purée
1 garlic clove (or more if you’re a big fan), crushed or minced
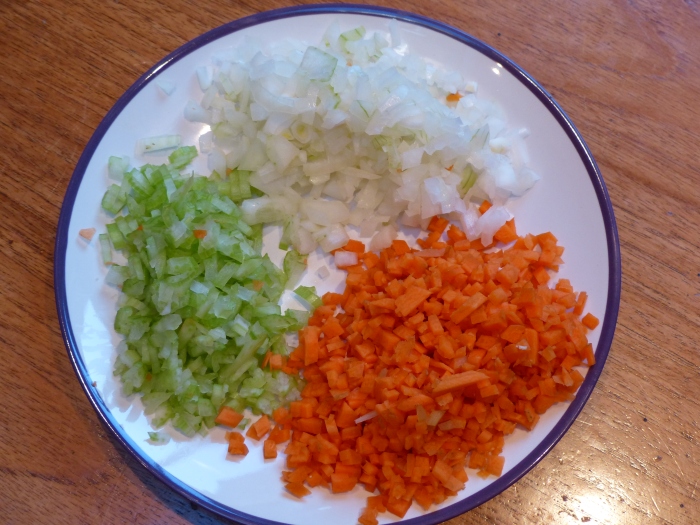
1 onion, chopped as fine or chunky as you like it
1 stick of celery, minced finely – optional
1 carrot, minced finely – optional
olive oil or butter
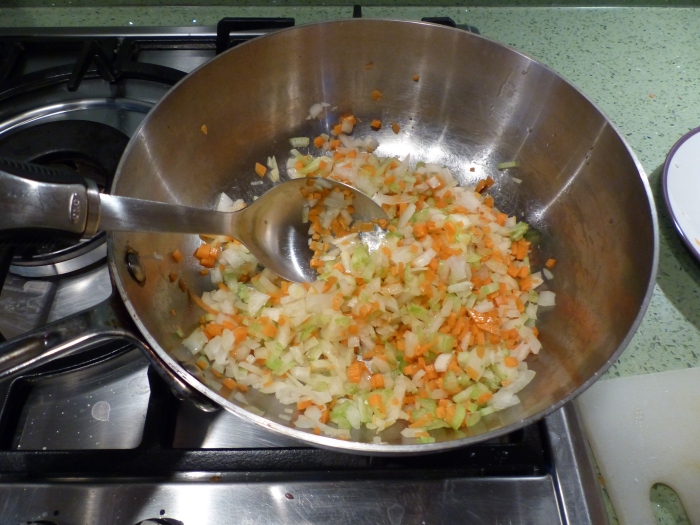
Start by sautéing the onion with a little salt in the olive oil or butter. If you’re using the celery and carrot as well, to make a soffritto (which I recommend!), add those here as well, and cook until they’re all very soft, stirring regularly. Then add the garlic, cooking it for a few minutes. Some people add their garlic right at the beginning, but I find, particularly if it’s chopped finely, it can burn easily, so I add it later.
 Pour in the chopped tomatoes and tomato purée, and leave to simmer gently for a little while. Keep an eye on it, giving it a stir now and then. You want the sauce to get nice and thick, which can take anywhere from 10-30 minutes. Make sure to give it a taste, and add salt and/or pepper as needed.

For toppings, the world is your oyster. Not that I’d recommend putting oysters on pizza, mind you, but whatever floats your boat. I prefer one or more of the following:
mozzarella cheese (mozzarella di bufala is the best!)
fresh basil
grated parmesan cheese
olives
mushrooms
pepperoni, chorizo or ham slices
sliced bell peppers
aubergine slices
more garlic and/or onions
chilli flakes or fresh chilli slices
Really, just about anything you like can go on pizza. Depending on how al dente you like your veg toppings, you might want to pre-cook them a little.

When your base and sauce are ready, it’s time to assemble the pizza. Spread the sauce thinly out on the base, almost to the edges. Then spread whatever toppings you’ve chosen on to the pizza (but save the fresh basil until after it’s done) and bake at 240C/220C fan/gas 8 for around 10-15 minutes, making sure not to let anything on top burn. Remove it carefully from the oven, and either slice it into wedges, or just tuck into the whole pie. Note that, unlike standard pizza, this crust may be a little too delicate to pick up slices by hand. I suggest using a knife and fork. That’ll also keep you from devouring it too quickly, something I am certainly guilty of!

So there you go. Just a few examples of some great dishes to make with the humble cauliflower. And if you want even more ideas, check out some really cool alternative cauliflower recipes here. Your brain will thank you.

 To start, let me just say that I love this recipe. It’s easy, inexpensive, low-carb, gluten-free, vegan (if you care about such things!), contains 0% guilt, and, best of all, is delicious. I hit upon it when we were doing a keto cycle and needed something on which to spread my homemade liver pate. I found a similar recipe on the web, adapted it a little, and bingo. So I will keep this intro short, and get right to the good stuff!