Can You Learn to Love Liver?

liver pateLiver. Be honest, for most you, your first reaction to that word would be something along the lines of yuuk or eeew! I can empathise. I spent much of my life avoiding the stuff at all costs. Growing up in a somewhat meat-phobic household, this wasn’t much of a problem when I was young. I was never force-fed liver just because it was good for me!

Well, good for you it certainly is. Very good. To quote Dr. Josh Axe, “When we typically think of superfoods, we think of things like green leafy vegetables, berries from the Amazon, cocoa, green tea and other plant foods. However, certain animal foods are also highly valuable due to their rich nutrient content, especially organ meats (also called offal), which is exactly why they have been included in traditional diets for thousands of years.” (Check out the full article here.)

So, yes, liver should be considered a superfood. For one, organ meats are between 10 and 100 times higher in nutrients than corresponding muscle meats. And to put this into perspective with other non-meat foods, every nutrient found in beef liver occurs in higher levels in the liver than in apples and carrots! Check out a chart detailing this nutritional info at the bottom of this very good article by Chris Kresser.

While you’re at it, have a look at these articles from Andrew Weil and Weston Price.

“But isn’t liver potentially bad for us because of the toxins?” you may ask. Here’s what Chris Kresser has to say: “A popular objection to eating liver is the belief that the liver is a storage organ for toxins in the body. While it is true that one of the liver’s role is to neutralize toxins (such as drugs, chemical agents and poisons), it does not store these toxins. Toxins the body cannot eliminate are likely to accumulate in the body’s fatty tissues and nervous systems. On the other hand, the liver is a is a storage organ for many important nutrients (vitamins A, D, E, K, B12 and folic acid, and minerals such as copper and iron). These nutrients provide the body with some of the tools it needs to get rid of toxins.”

That said, you should only ever buy high-quality liver. Organic is a must, and ideally grass-fed in the case of beef and lamb. Stay away from anything CAFO! The good news is that even high-quality liver tends to pretty cheap, certainly cheaper than comparable muscle meat.

But isn’t liver high in fat?” Yes, liver and other organ meats are high in saturated fat and cholesterol. However, despite years of having the contrary drummed into us, plenty of recent research indicates that there is no significant evidence that dietary saturated fat is associated with an increased risk of coronary artery disease. Research also suggests that we’ve been misguided about the relationship between dietary cholesterol and increased heart disease as well. But that topic is worthy (and lengthy) enough for its own article, so I’ll leave it there.

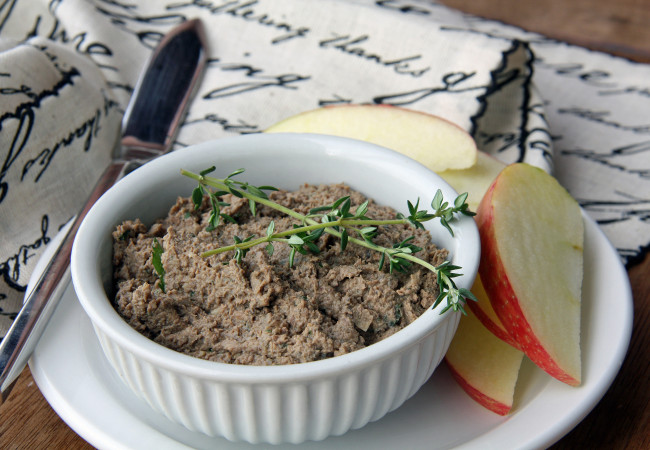
Okay, by now you should be pretty convinced that liver is healthy for you. But you may still be thinking. “Yeah, but it’s gross!”  Well, okay, I admit preparing raw liver is a little disgusting, but I’m going to show you a recipe that is very easy and, in my humble opinion, rather delicious. And this is coming from a confessed liver hater! I’m talking about good old liver pate.

Pate is a great way to easily incorporate the health benefits of liver into your diet. It’s one of our main go-to in-between-meals foods these days, so I always try to keep some in the fridge. Snacking without guilt!


A few notes before the recipe:

  • I use chicken or lamb’s liver as they tend to have the most mild flavour.
  • Don’t fear the fat! There is a good amount of fat in pate, but as long as it’s good fat, eg organic animal fat and butter, coconut and olive oils, etc., you shouldn’t worry about it. Especially so if you’re already following a low-carb diet.
  • I’m very imprecise with my measurements. I prefer to cook using taste and experience, so apologies to anyone who prefers detailed amounts of ingredients. Besides, mindfully adding ingredients will make you a better cook, rather than just blindly following recipes. Don’t worry, though, I do give guidelines.

Ingredients

  • Liver, 250-500 grams or so
  • 1 onion, chopped
  • A few cloves of garlic
  • Coconut oil, ghee or other good oil for frying, 1-2 tablespoons
  • Allspice, a few teaspoons
  • Butter, 1-3 tablespoons or more depending on the amount of liver
  • Port/other sweet wine and/or balsamic vinegar (optional)
  • Salt (Himalayan or good sea salt) and pepper


Start by trimming off any sinew from the liver. Don’t worry if there are a few bits left. You can cut the liver into small pieces if you like or leave it in the big blobby shapes it comes in. Whatever’s easier for you to manage in the pan.

Heat the oil and fry the onion over a lowish heat so it caramelises nicely without browning too much. (though feel free to brown them if you prefer your onions that way) Adding a little salt to the sauteing onions can help reduce burning.

When the onions are looking soft and golden (not incinerated), raise the heat a little and add the liver. I like to add the garlic at this point, too, so it’s not as well done as the onion, keeping more of its intensity. Turn the pieces every few minutes so they brown on all sides.

When the liver’s about halfway done, you can add a few glugs of port or other sweet wine if you like. You can use dry wine too, but I prefer a touch of sweetness to help cut the richness of the liver. The alcohol will cook off in a minute or so, so safe to serve to non-drinkers. (Note that the port will impart a dark colour to the finished pate, so if you’re all about aesthetics you can skip this ingredient.)

Continue sauteing, stirring every minute or two until there are no more blood droplets on the outside of the liver pieces. Most chefs suggest leaving liver a little pink in the middle – feel free to cut pieces open to check. My own thoughts are that the texture might be a little smoother when they’ve got some pink left, but the taste shouldn’t be any different.

When it’s all done, let the mixture cool before adding it all to a food processor, along with salt, pepper, and – if you want a bit more bite and sweetness – a tablespoon or so of balsamic vinegar. At this point, you’ll also want to start adding butter and allspice.  Good butter really helps this recipe, and if you’re squeamish at all about the aftertaste of liver, it helps reduce that. So, too, does allspice, so you’ll want to use a good amount of both of these. Start with a smaller amount, though, blitzing the pate into a smooth paste, and keep adding more of each (as well as salt and pepper, if desired) until you find a nice balance of spice and richness.

You may find that you need to thin the pate out a little bit, as it can get pretty thick. I just use a bit of water, using a spatula to scrape the sides, and blitz some more. Some people use milk, or even cream (yeah, baby!) for this, but I think it’s rich enough with lots of nice butter.

Once it’s all blended nice and creamy, and seasoned to your taste (always taste your food whilst before serving!), you can scrape it into a container or two, let it cool and eat it or pop it into the fridge. I often freeze half the amount so I can have back-to-back batches without worrying about one going off. Freezing will degrade the texture a little bit, making it slightly more crumbly, but it still tastes great.

Spread the pate on some nice bread, use it as a dip for crudites or, hell, just eat it with a spoon. We’re low-carb (and this pate is too!) so we love it with carrot or celery sticks, or even better, homemade crispbread.

This approach to cooking liver has turned me from a hater into a fan, and I hope it can help you, too, to learn to love liver!

liver pate with apple slices

Advertisement

Boning up on Broth

Bone-Broth

After last week’s veg-centric post on the wonders of cauliflower, I’d like to go to the meat side for something quite different, but no less healthy. If cauliflower can be considered brain food, then perhaps the subject of this post, bone broth, could be thought of as gut food, given its well-established gut-healing properties. However, to leave it at that would be selling it short, as it contains a myriad of health benefits. But before I elaborate further, let me step back a second.

What is bone broth? At its most simplistic level, it’s just boiled bones. But isn’t that just stock, you may ask, like the stuff that comes in little cubes from the supermarket? Well, not quite. They share some similarities, but in reality they’re a world apart. Stock cubes, and even most liquid stock, bought in shops have a lot of added flavouring but none of the natural goodness that comes with slow-cooking bones for long periods of time. I might add that, technically, stock is made from bones and connective tissue, whereas broth is the liquid that meat has been cooked in. However, for some reason, bone stock is more commonly referred to as bone broth. If you know why this is, please leave a comment below. For the purpose of consistency, let’s call it bone broth.

Why bone broth? Let’s start with the health benefits.

  • Have you ever heard chicken soup referred to as Jewish Penicillin? If so, it’s because it’s been used for ages to help cures colds and ills. But what is it in the soup that gives it this reputation: the bones! Or rather, what’s in the bones that gets transferred to the broth over the long cooking time. For one, there’s a natural amino acid called cysteine, which can thin the mucus in your lungs and make it less sticky, enabling it to be expelled more easily.
  • Then there are the minerals: calcium, magnesium, potassium, and phosphorus for starters. All stuff your body needs, and bone broth delivers them in an easily-absorbable package.
  • Do you have joint issues? Throw away your glucosamine + chondroitin tablets, as the collagen in bones, tendons, ligaments, and other flexible tissues, is broken down during the cooking process into  gelatin, which gives your body the raw materials to rebuild your own connective tissue, especially tendons and ligaments. It also enhances your skin, nails and hair – my wife swears by it!
  • I mentioned gut food previously. This is because bone broth contains both Glycine and Glutamine, two amino acids that can really help rebuild your gut lining.

I could go on and on. If you want to read a bit more about the health benefits of bone broth, check out the following articles, or just Google bone broth. There’s loads of great stuff out there on it.

Eat This:Bone Broth
Bone Broth—One of Your Most Healing Diet Staples
Bone Broth Benefits for Digestion, Arthritis and Cellulite

Finding good quality bone broth in shops can be a tricky affair. Some good butchers sell it, and there’s even a restaurant in NYC called Brodo which specialises in it, but the best way to get hold of it is to make it yourself. Fortunately it’s really easy! This is especially the case if you have a slow cooker, and if you don’t, I recommend you get one.  They are pretty cheap and very useful. Some, like the one I have, are actually rice cookers with added slow cooking features. Bonus! You can make your broth in it, and then use the broth to make your rice. But I’ll go more into how you can use your broth later.

First you need some bones. Any kind will do. Beef, lamb, pork, chicken, fish, whatever. You don’t have to limit your broth to one type, either. You can mix them, too. It’s important that you start with good quality bones. Ideally organic, and if beef, from cows that have been grass-fed. If you’re wondering why grass-fed, check out this trio of articles that I also referenced in my beef jerky post:

The Differences Between Grass-Fed Beef and Grain-Fed Beef
Why Grass-Fed Animal Products Are Better For You
Why Grass-Fed Trumps Grain-Fed

So where do I get my bones? From several places. First, whenever I cook up a roast, be it lamb shoulder, pork belly, chicken, etc., I save any bones. Wrapped up well, they can be stored in the freezer for a really long time until you’re ready to use them, so don’t throw them out!  If I don’t have any bones on hand, I’ll get some from my local butcher. I’m fortunate to have two nearby, M. Moen & Sons and The Ginger Pig, that sell really good quality meat. They will sell bones for cheap, or even give some away for nothing in some cases. Sometimes I order meat online from Donald Russell, based in Scotland, as they sell grass-fed (though not organic) beef at good prices, and if requested, they will throw some bones into an order for no extra charge.

If you are getting bones from the butcher, try to get ones that will fit in your slow cooker or stock pot. Trust me, I’ve slogged away with a hacksaw cutting up big beef leg bones, and it ain’t easy. If in doubt, ask the butcher to cut them for you, as they’ve got the right tools for the job! Also, if you can, try and get some joint bones, as the connective tissue in them is extra good for you. Makes your broth really thick, too, because of the amount of collagen which, if you’ve been paying attention, turns into gelatin.

For this batch, I've used a combination of lamb ribs from the butcher, and some leftover chicken bones from a roast.

For this batch, I’ve used a combination of lamb ribs from the butcher, beef off-cuts, and some leftover chicken bones from a roast.

Some people like to first roast the bones in a really hot oven, say 250C/450F, for 20 minutes or so to brown them and render any fat off them. I’m a bit lazy, and not afraid of a little fat, so I usually skip this step. Place the bones in the slow cooker and fill it with water.  If you have any veg bits that you’re not keen on eating, such as carrot tops, cauliflower leaves, etc., you can add those too. Just give them a rinse first. You can also add some seasoning here if you like. I tend to use my bone broth as part of other recipes which call for their own seasoning, so I don’t add much.  A few peppercorns and a couple of bay leaves are pretty much it. You can opt for adding onions and garlic, as they add nice flavour. I also add a couple of spoonfuls of vinegar, as supposedly it helps leach the nutrients out of the bones. One ingredient that I started adding recently is dried seaweed, as it’s got loads of minerals and good stuff that we don’t normally get enough of. I suppose it might add a touch of salty goodness as well.

I tend to start the slow cooker off on a high heat setting for the initial hour of cooking, especially if I haven’t roasted the bones first. This isn’t essential, but for some reason I feel better knowing that I’ve boiled everything a little first to kill any unwanted bacteria. Then I turn it down to a low heat, and leave it be for 24 hours (for chicken or other small bones) to 48 hours (for chunky beef and lamb bones). The nice thing about using a slow cooker instead of the hob, is that (with the exception of the initial boiling period) it won’t stink up your house with meat smells for days. Also, you don’t have to worry about the liquid boiling off or the gas flame accidentally going out.

When it’s ready to go, strain the liquid into a storage container and chuck out whatever’s left. If you’ve got pets, you can give them a treat with any meaty bits that have come off the bones. You can now either use the broth right away, or (once cooled) freeze it for later use. I usually freeze half of mine.  It’s worth noting that the cooled broth will often have a layer of congealed fat on it. You can either skim this off and use it for cooking, or throw it out if you’re a bit fat-phobic. But remember, this is good fat. Saturated fat has been demonised for years, but people are now getting hip to the misinformation we’ve been force fed by governments in bed with big food companies. Read more here or here.

So, I’ve now got all this bone broth, what do I do with it? Plenty!

  • It makes a great base for soup. I make a weekly pot of veg soup, using broth in place of, or in addition to water. It makes the soup much richer, tastier, and healthier. I could do an entire post about soups, and perhaps I will at some point. Watch this space.
  • Use it in place of water to cook grains. Your rice, barley, quinoa, etc., will taste sooo much nicer.
  • Add it to casseroles or sauces which need liquid. A mixture of bone broth and wine (or port or vermouth) does wonders for a hearty stew.
  • Make gravy with it. You’ll need to season it, and thicken it a bit with flour or corn starch, but it’s dead easy.
  • Drink it as a hot beverage on a chilly day. I usually season it with a bit of soy sauce, but you can add whatever you like.
  • Bathe in it! Okay, I’m kidding with this one. Bone broth is best taken internally.

So there you have it. Bone broth is tasty, healthy, versatile and cheap. The only excuse you’ve got for not using it is if you’re a vegetarian. And if so, I’m afraid you’re really missing out. Ah well, more for the rest of us.

Until next time…

bone-broth-jars

The Lamb Lies Down on Moxon Street

Just a quick one here on what’s probably my favourite meat: Lamb (Okay, maybe bacon aside, but IMHO that porky goodness occupies its own space in the carnivore’s universe!)

For my wife Sue’s birthday, I gave her a butchery course at the Ginger Pig here in London. Some of you may be thinking, ‘Gee, that’s not a very romantic gift.’ Maybe not, but trust me, she liked it. And I did, too, as I got to go along on the 2nd voucher I bought. Woo!

The Ginger Pig is well-known for selling excellent quality meat from its seven London retail locations. The course was being run out of their Moxon Street location in Marylebone, an area filled with ridiculously chichi shops displaying 5 items of clothes, priceless antiques, or Rolls Royces. There’s even a shop dedicated solely to buttons! Fortunately, the butcher shop was down to earth, and not snooty in the slightest.

Upon our arrival, we were greeted by a lamb carcass laid out on an enormous butcher block. Fortunately, it appeared we would not need to first hunt down and slaughter the evening’s subject. That was a relief.

IMG_20151120_190223

Our tutor for the evening, a proper old school London butcher named Perry, gave us the lowdown on what we were to expect. We were to learn all the different cuts that make up the lamb, then try our hand at some butchery techniques, followed by a big old meal of, yeah, you guessed it, lamb. Sounded good to me!

IMG_20151120_191442

And good it was. Perry proceeded to carve up the carcass into its multitude of cuts, encouraging the students to try a cut here and there. We learned a little about knife technique, using the sharpest knives I have ever encountered. Good thing we were provided with a sparkly safety glove. A little reminiscent of Michael Jackson, though I couldn’t imagine him ever doing this. Of course, there was the ubiquitous meat saw as well, not at all dissimilar to the metal-cutting hacksaws I’ve got in my tool box at home. Sue even got to have a go with it, practising her ovine surgery skills.

IMG_20151120_193859

Eventually the entire lamb was broken down into all of its cuts. In addition to the familiar leg, shoulder, chops and rack, we learned about some of the often overlooked cheaper cuts which are delicious when slow cooked, such as the scrag end (neck) and breast. The latter is apparently best cooked up similarly to a pork belly. I’ll definitely be giving this a try sometime soon!

Then the class had the amusing task of trying to put the whole carcass back together, a real 3D meat jigsaw puzzle, and not as easy as you might think!

IMG_20151120_200710

For the final educational portion of the class, each student was given a massive lamb shoulder, and the directive to bone it, ideally without making a complete mess. Again, more of a  challenge than you might expect, particularly as the shoulder blade is completely hidden within the flesh, creating quite a meticulous procedure to remove it without cutting the whole shoulder in half. But in the end we managed it.

To be honest, I found that easier than the final step, which was to roll and tie it up. I realised years ago, when taking a sailing class, that knots are not my strong point, and this was strongly reinforced as I struggled mightily to bind it up. But Sue gave me a hand after she finished hers, and we were gifted our massive lamb shoulders to take home with us. 3 kgs without the bones, and a usual price tag of £50 each!

IMG_20151121_112153

For the grand finale it was time to eat! Huge trays of slow-cooked lamb shoulder and shanks were brought out to us, along with lovely buttery mash and, most appreciated, numerous bottles of red wine, which flowed down oh so nicely.

Stuffed and tipsy, we packed up our carnivore swag, which also included several kilos of lamb bones destined for our stock pot, and dragged ourselves home. Good thing we love lamb as we wound up eating it for the rest of the week!

IMG_20151121_185249

Beef Jerky Time!

I’m sure you’ve all heard about the recent report from the WHO proclaiming the dangers of red meat, and even more so, processed meat. Never have so many vegetarians felt so smug. I’m not going to weigh into this debate as it’s been done better many times by many more knowledgeable people than me. (Though I do have my opinions on the subject, so don’t get me started!) Rather, I wanted to take an example of one (probably rightly) demonized food, and tell you about a healthy and delicious alternative that I make regularly. I’m talking about beef jerky.

For those unfamiliar, jerky is a dried meat product fairly common in the US, and to a lesser extent, the UK. It’s somewhat similar to biltong, though South Africans would probably shoot me for saying that. Much the same way an Aussie or Brit would skewer anyone saying marmite and vegemite are the same thing. That’s another debate you won’t catch me weighing into!

Jerky is a salty, chewy little snack that seemingly lasts forever without going off – usually a bad sign with any food.  It’s a tasty treat and and good protein/energy kick when you’re on the go hiking, travelling, or whatever. The problem is that it’s generally full of bad stuff. For instance, just a quick check of a common store-bought brand lists the ingredients as:

Beef, sugar, water, soy sauce solids (wheat, soybeans, salt), salt, natural spices and flavoring, hydrolyzed soy protein, monosodium glutamate, garlic powder, guar gum, polysorbate 80, caramel color powder, sodium nitrite.

Hmmm, definitely a lot of stuff in there that I’d rather not be putting in my body. For starters, sugar is the second ingredient! Even the most backwards nutritionists these days are now hip to the fact that sugar, not fat, is the main reason for the obesity and type 2 diabetes epidemics we’re experiencing in the west, so right off the bat we’ve got a big no-no. Then there’s MSG, and sodium nitrite, two other questionable additives found in many processed and cured meat products. And we haven’t even discussed the actual beef, which is most likely the factory farmed, hormone-and-antibiotic-filled misery meat found in most budget carnivorous offerings these days. This, you definitely want no part of!

Okay, so I’m going to step down off my soapbox now, and tell you that it’s actually really easy to make your own version of this moreish snack that is yummy and healthy.

The first, and most important thing you need is some good beef. This is the only expensive ingredient in jerky, as I definitely recommend you spend a bit more to get organic, or at least, grass-fed beef for this. You may ask ‘why grass-fed’? Check out these articles if you want more info on that:

The Differences Between Grass-Fed Beef and Grain-Fed Beef
Why Grassfed Animal Products Are Better For You
Why Grass-Fed Trumps Grain-Fed

It’s important that the beef doesn’t have much fat in it. Not because the fat is unhealthy, but because the fat doesn’t dry out in the dehydration process. You can always trim any fat off before making the jerky. I often use rump steak, as it’s not super expensive and is usually quite lean.


P1040994

It’s worth noting here, that you don’t even have to use beef. Venison works really well, too, especially as it’s very lean. I’ve never tried using lamb, but I imagine you’d need to trim the hell out of it, being that it’s generally so nice and fatty. I might give it a go one day, though. Apparently there’s even pork jerky, but it seems it’s necessary to freeze the pork for a period of time before using it to kill the bacteria which can cause trichinosis, so you might want to avoid this if you’re not feeling adventurous.

The first thing you need to do after trimming any excess fat, is slice the meat very thinly against the grain. You’ll need a nice sharp knife for this. I try and keep the slices about 2-3 mm, or ⅛” thick, but it’s okay if it’s thicker than this. It’ll just take longer to make. A good trick for making super thin slices is to freeze the meat a little beforehand. Not so it’s a frozen brick, but so it’s firm enough that it won’t get all squishy when you hold it down to slice it.


P1040996


P1050002

Once you’ve got your meat strips, it’s time to marinate them. This is where it gets fun, as you can use tons of different flavourings depending on your tastes. I tend to use a simple mix of soy sauce (or tamari, in my case, as it’s gluten free), sherry vinegar, cayenne pepper and black pepper. I’ll mix these to taste, but if you’re a slave to measurements, I’d say approximately two tablespoons soy, 1 tablespoon vinegar, and a couple of dashes of each of the peppers. Like I said, you can experiment here with whatever works for you (onion and/or garlic powder, Worcestershire sauce, liquid smoke to name a few), but I would avoid anything too chunky or oily, as you’re going to want the meat to be able to dry out with a very low heat.

Mix up the meat and marinade, seal it up and stick it in the fridge. I let it marinate overnight, stirring it up a little now and then to make sure everything is nice and coated. You can probably get away with a few hours of marination, but if you can plan it in advance, the longer the better!

When it’s ready to go, lay the meat strips out on a rack (you may want to have a roasting pan underneath although it shouldn’t drip much) and pop it in the oven. Turn the oven on to its lowest setting, around 50° C/ 125° F, and prop the oven door open about 2 inches or so. This is to let any moisture escape. If your oven door won’t stay open by itself, stick a wooden spoon or something similar in it to hold it open.

P1050023


How long you’ll need to leave the jerky in the oven will depend on how thin you’ve sliced the meat, as well as your oven. I think fan ovens will dry the jerky faster. My jerky usually takes about 3-4 hours, turning the meat over once during drying, but I’ve read of some people keeping their jerky in for 10 hours. I’m guessing they’ve sliced it much thicker and/or have much lamer ovens.

‘How will I know it’s ready?’ you may ask. Take the tray out and test a few strips by bending them. They should be firm, but flexible. As some slices may be thicker than others, I’ll test each piece, taking out ones that are done, and leaving the rest to continue drying. Leave the finished jerky to cool fully before sealing it up and storing it.

IMG_20151125_111620

As this jerky doesn’t have any preservatives or sugar, it won’t last nearly as long as the store-bought stuff. I’d aim to eat it all within about a week, so wouldn’t make a massive batch. Refrigeration will prolong the life, but I prefer the taste of jerky at room temperature, so I have it in a covered container in the cupboard.

One technique I came across in my research is adding an extra degree of safety by heating the finished jerky in a preheated oven for 10 minutes at 135° C /275°F . I’m not much of a germaphobe, so haven’t tried it myself, but you can use this method if you have any concerns.

So there you have it. Give me a shout if you’ve got any questions, but now it’s beef jerky time!